Table of Contents
Getting Started With 3D Printing
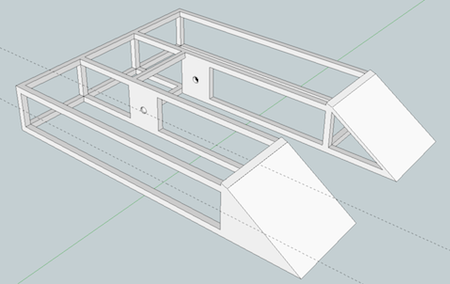
One of the latest trends we are seeing in Antweights is people designing chassis and parts for their robot on the computer, and then using a 3D printer to turn that design into a physical item. Using 3D printing may seem daunting at first, but its actually quite a simple process. This guide aims to provide a starting point to help you get into 3D printing.
So, lets get going…
What is 3D Printing?
3D printing is exactly precisely what it sounds like, you create stuff on the computer and then print it off like you would a Word document. The difference with 3D printing, compared to conventional printing, is that instead of printing out a sheet of paper you actually print a real 3D object. In terms of Antweights, 3D printing an is ideal way of making components like wheels, weapon systems or even a complete chassis.
What do I need to start 3D printing?
You need two things:
- Some 3D design software on your computer
- A 3D printer (or 3D printing service, see below)
3D Design Software
Many Antweight builder use SketchUp (formally Google SketchUp). Its simple, but it works and provides all the functionality required for most robot designs. It is also easy to use and has a much better interface than many of the alternatives.
The rest of this guide will assume you are using SketchUp, however the process should be fairly similar for other design software.
3D Printing Services
When the time comes to print your 3D designs, there are two options. You can buy your own 3D printer, which gives you total control over the printing process and means you'll have your 3D objects immediately without waiting for a third party to post them to you. However, 3D printers are extremely expensive, and unless you are going to be doing vast quantities of printing are likely going to be uneconomical.
A much better (and cheaper) alternative is to upload your designs to a 3rd party printing service and have them print and then send your objects to you through the post. There are several companies that provide these facilities, with the most popular by far being Shapeways.
The rest of this guide will assume you are using Shapeways, the process may differ slightly if you use alternative services.
How do I 3D Print Components for my Robot?
Before starting you should download and install a 3D design software program, like SketchUp. You should familiarise yourself with the program before attempting any complicated designs. Unless you have got your own 3D printer, you should also choose which 3D printing service you are going to use. Most people use Shapeways.
Step 1: Designing Objects in SketchUp
Ideally, before attempting to design a chassis or any complicated components you should familarise yourself with the SketchUp interface and how it works. A good way to do this is by designing a simple object like a wheel, before moving on to more complex items. There are some excellent tutorial videos for beginners on the SketchUp website.
Step 2: Exporting Objects
By default, SketchUp saves your files in format that is not compatible with Shapeways. Fortunately solving this problem is very simple, and can be done using SketchUp's export feature to change the file into the COLLADA (.dae) format.
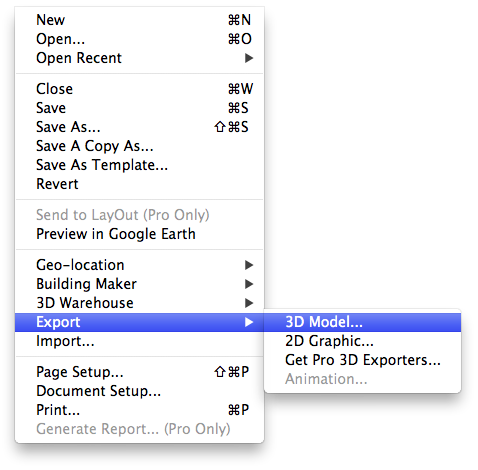
To do this, click the File menu in SketchUp, then do Export > 3D Model… as shown below.
This should then bring up the standard SketchUp save dialogue, which will allow you to save the file as normal, while keeping it in the correct format for uploading to Shapeways.
Step 3: Uploading to Shapeways
To upload a design to Shapeways you will need to register an account with them. Once you are signed up and logged in, click Create and then Upload. You can now choose the file you wish to upload (if its in the right format the file's name should end with .dae). Once the file is uploaded, it is then checked by Shapeways to make sure that they can print it. Once this process has been completed they will email you to tell you your model is now available for printing (or if there was a problem with your design, what that problem was).
Your design is now ready to print!
Step 4: Choosing a Material & Printing
You can now print your model by viewing it on Shapways.com, adding it to your shopping cart and proceeding to the checkout. Here you will find out how much it will cost to print your item. Shapeways calculates this cost based on the amount of material (i.e. solid structure) you have in your design. As a general rule, smaller items or items that do not have many large surfaces will cost less than larger and more solid items.
Before adding an item to your shopping basket, Shapeways allows you to choose the material you want them to use when printing it. For most robot purposes the default material “White, Strong & Flexible” (or any of the other coloured “Strong & Flexible” materials) is the best option to choose.

